Add a User
This post describes how to add a new user to your Azure DevOps organization using the web interface of Azure DevOps Services. It assumes you are already logged in and that you are a Project Collection Administrator. Organization owners are automatically Project Collection Administrators. If you created the organization, then you are its owner. We also assume you have allowed external users to join your organization. This setting can be found in the Policies section of the organization settings.
Step 1: Navigate to Organization Settings
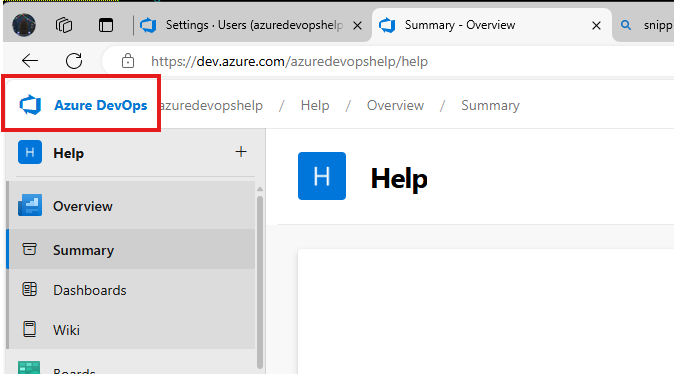
Find the Organization Settings button in the bottom left corner of any organization-level page. If you are on a project-level page, you may see Project Settings, instead. To get to an organization-level page, click the Azure DevOps logo at the top left.
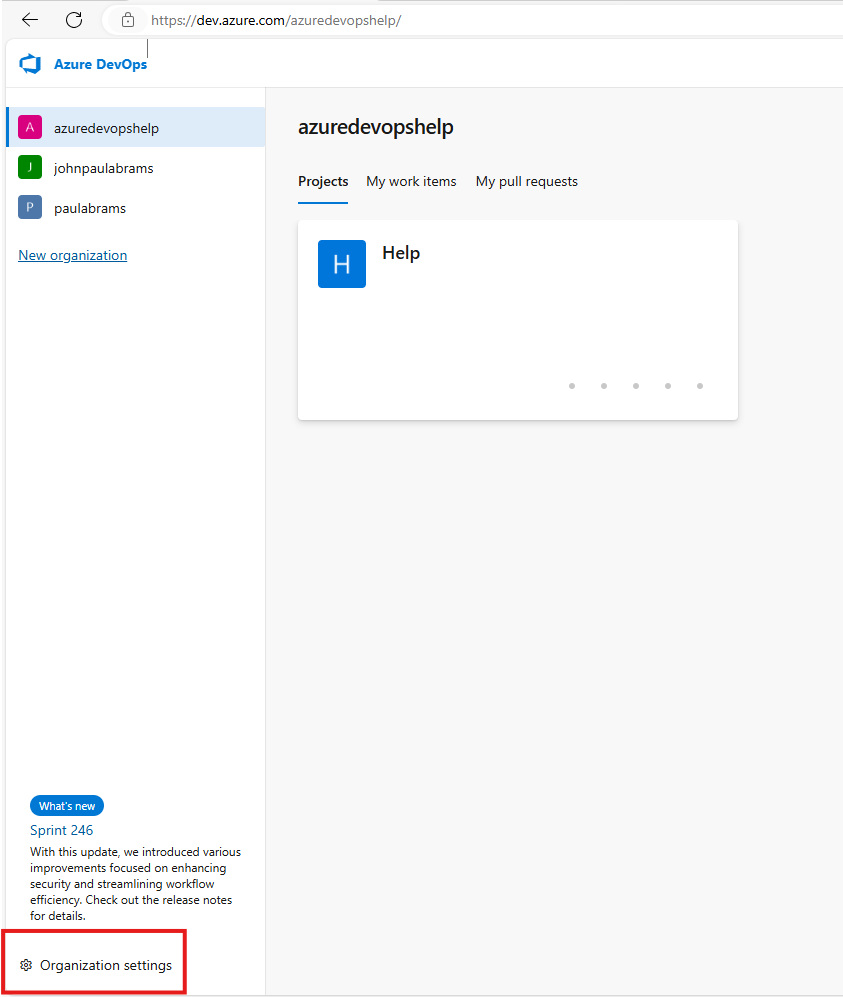
From an organization-level page, click the “Organization Settings” button at the bottom left corner.
Step 2: Access the Users page
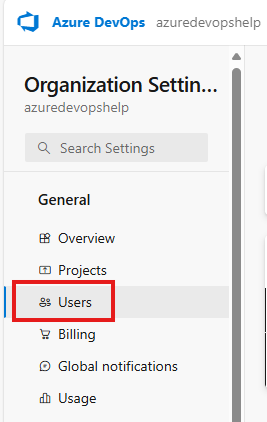
Once in Organization Settings, find and click the “Users” tab.
Step 3: Click the “Add User” button
On the Users page, click the “Add User” button at the top right corner.
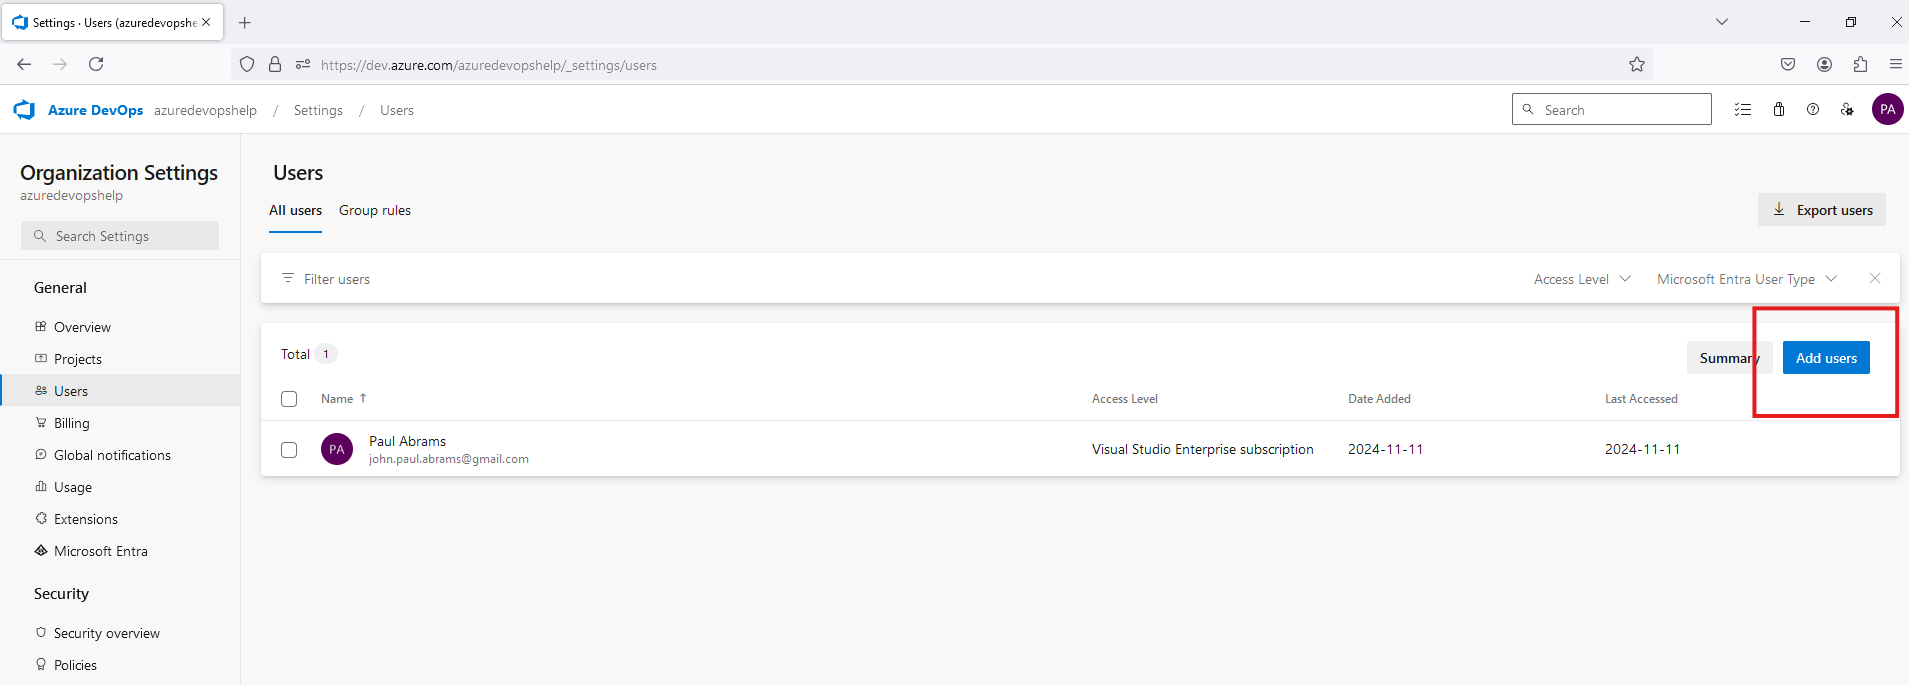
A popup will appear asking for details about the new user.
Step 4: Enter user email address
In the first field, type the email address of the user you want to add. If your organization does not allow external users, you may need to set the appropriate organization setting, first, in the Policies section of the organization settings.
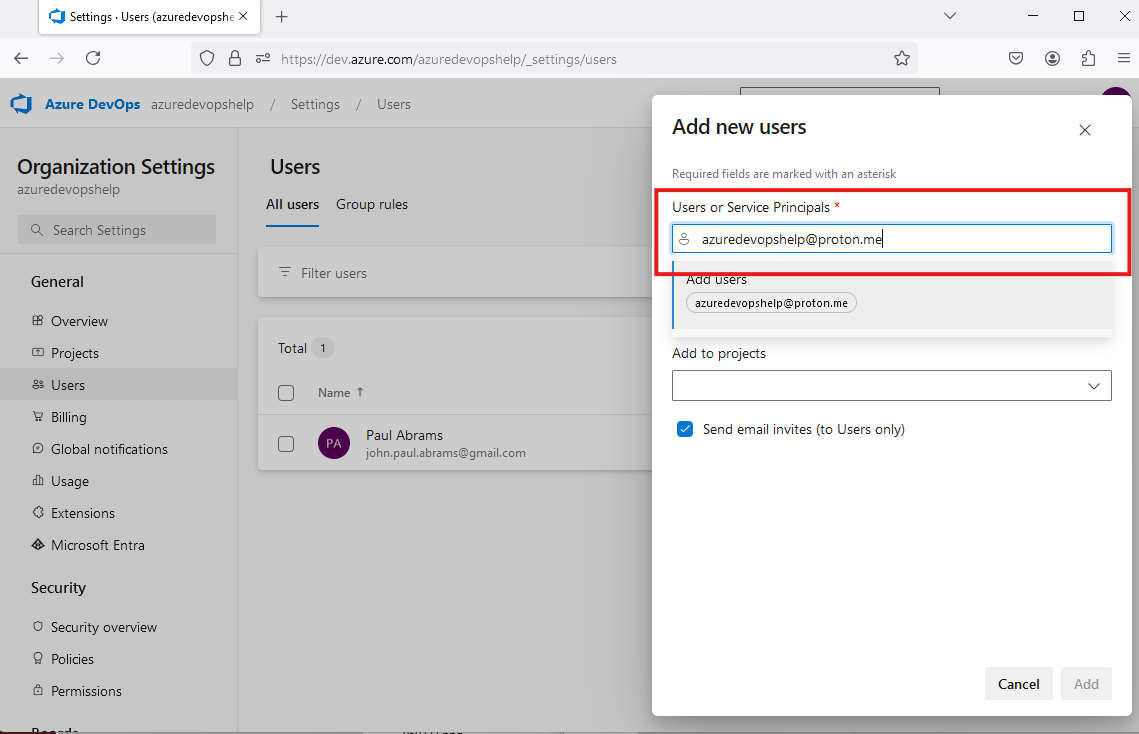
You may add multiple email addresses here if you want to add multiple users at once, with the same settings. We reommend just adding one user at a time, until you are comfortable with the process.
Step 5: Select user access level
In the second field, select the access level for the new user. The access level determines which features will be available to the user, based on the license allocated to that user. Depending on your choice, you may incur a cost. The stakeholder access level is always free, so choose that one to be safe. Most organizations are allowed five free Basic-level users, so you can choose that option if you have free licenses remaining, or if you don’t mind incurring some costs.
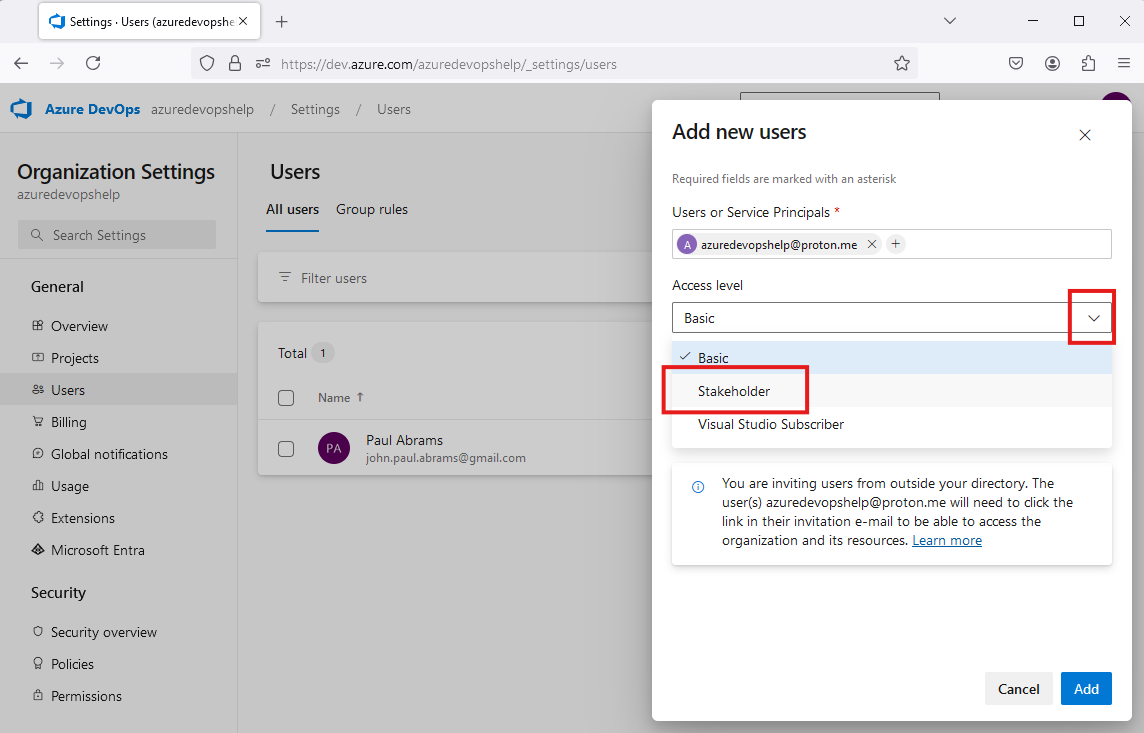
For more information about access levels, see the Azure DevOps documentation - About access levels.
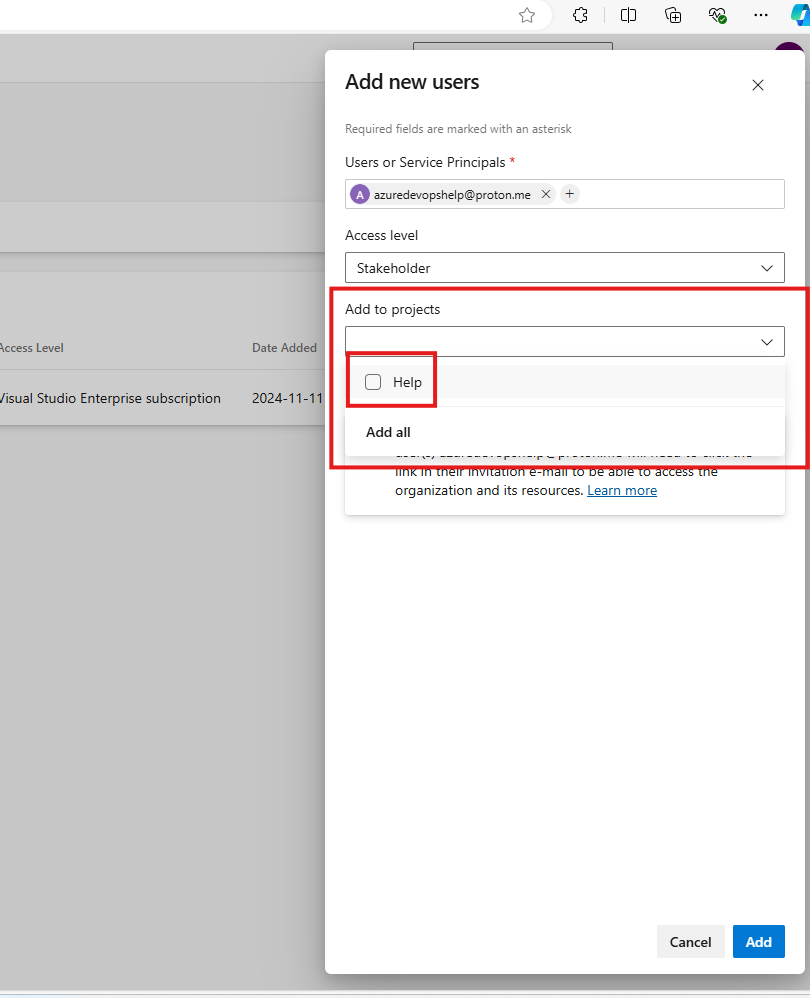
Step 6 (optional): Add user to a project
This step is optional, but users won’t be able to do very much without being added to a project, so you might as well do it now. To add a user to a project, select the project from the dropdown menu. You can select multiple projects if you want by clicking the checkboxes next to the project names. In our example, we only have one project created so far, called “Help”, so we’ll select that one.
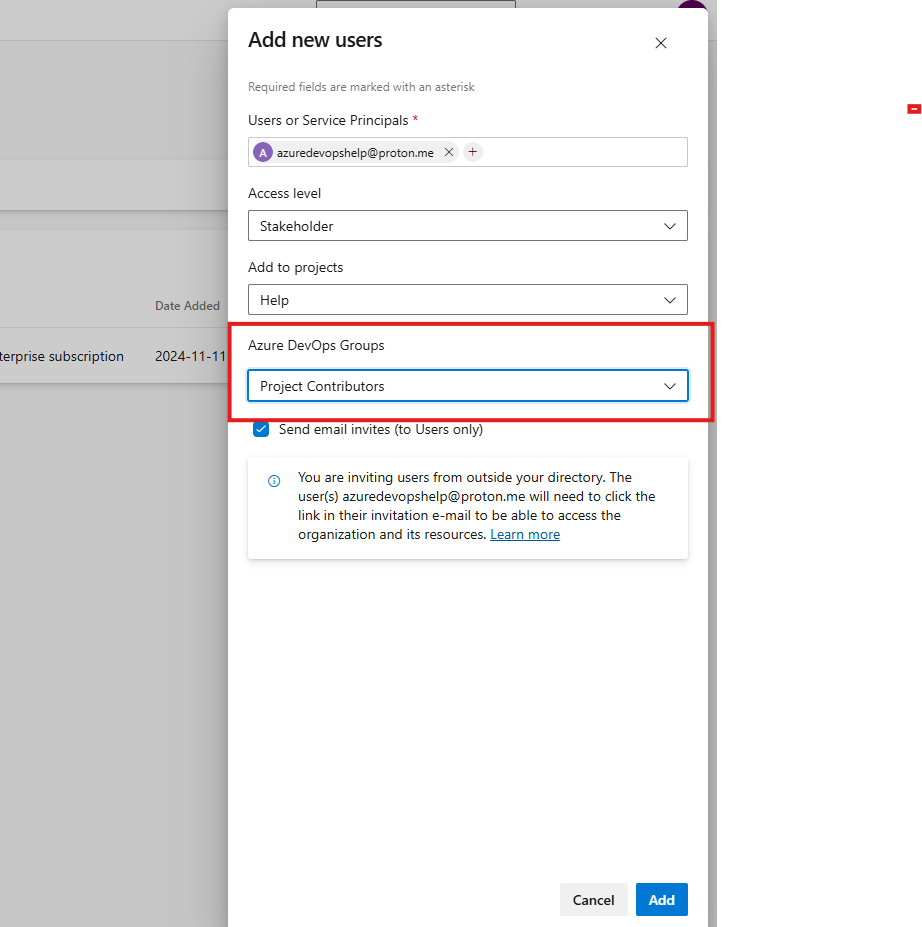
Step 7 (optional): Assign appropriate role to the user
You can change the role from the default Contributors if desired. Readers can only view the project, but not contribute to it. Administrators can view, edit, and manage the project. It’s possible to have additional roles show up here, as well. But let’s just stick with the defaults for now.
Step 8: Decide whether to send a welcome email, then click “Add User”
By default, a welcome email will be sent to the new user. If you don’t want this email sent, uncheck the box labeled “Send email invites”. Then, click the “Add” button at the bottom right.
All Done!
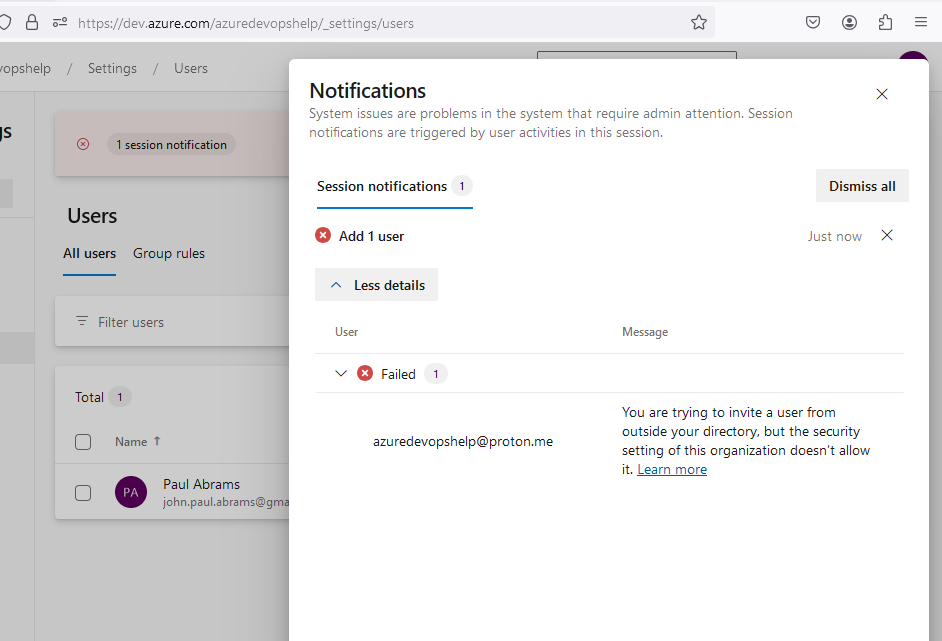
If all went well, you should see the new user listed in the Users page. If there were any errors, you’ll see an error message displayed, or a smalled “Failed” popup that you can click for more detail. Here’s an example of what happens if you try to add an external user without allowing external users in the organization settings: